I have not been keeping up with this blog, clearly, just as I haven't been keeping up with my quilting. I'm working this week on the pieced back to a quilt for Starman's niece, Lucy. I've finished the top, but I got it in my head to make a top using a technique I saw on TV called "tubular quilting." There's a book by Rita Hutchens that shows how you sew strips together into a tube, then cut the tube into strips, sew those strips together into a tube, cut that tube up, and sew those bits together. It's ingenious, but still ambitious for the back of a quilt. The good news is that it will make a large piece of fabric for the back that won't have to be perfectly straight vis a vis the top.
I owe you pictures, and you will get them, I promise.
I did have fun today shopping. Just as I live a zillion miles away from my quilt guilt, I live a long way away from the nearest quilt shops. I wanted the sort of threat that's good for piecing -- it's thinner (finer would be a better way to describe it, I guess) so the seams aren't bulky and that makes for a better, more consistent quarter-inch seam. Anyhoo, I have some in a medium grey, but I know I'll run out soon. I thought, Oh, goody, an excuse to shop! Come to find out, neither shop I visited has the sort of thread I was talking about. (One shop had finer thread, but it was polyester. It make be a superstition, but I do adhere to the principle that the thread should be the same fibre as the cloth, namely cotton.) But they both had sale fabrics -- more of the key fabric I'm using for the backing, and some great backing fabrics at one shop, and lots of pretty pinks, florals & green leafy fabrics at the other.
I came home very happy with my purchases, even if I didn't actually get the one thing I wanted! And that's pretty much the story of fabric shopping for me...
Wednesday, December 31, 2008
Saturday, November 8, 2008
Amelia's Garden Quilt
I did actually finish this one, just in time (like -- no lie -- the night before we arrived in Ruislip, where Amelia lives) for our visit to Starman's sister and brother-in-law.
 Here's Amelia on her brand new quilt. She's wearing her bridesmaid dress -- it turned out to be a surprisingly warm and sunny September day.
 Her blue and white dress was, of course, not Amelia's choice of color scheme -- she's a very pretty-in-pink sort of girl. The quilt fits in much better with her aesthetic.
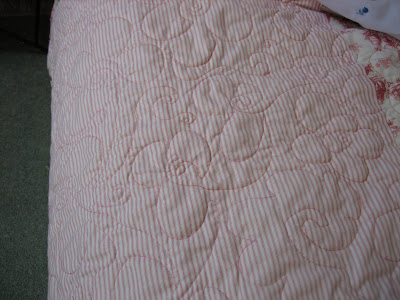 Free motion quilting on the back -- again, I borrowed a loopy floral design I saw in a magazine. I'm not yet considering myself an accomplished free motion quilter, but I'm getting better. Most importantly, I now feel confident that I can do the quilting on these utilitarian quilts. I'm not yet at the "heirloom" quilt level, and forget show quilts. But hey, most of what I want to do is make utilitarian quilts, so that's fine for now.
 This isn't a very helpful photo, but if you click on it you'll be able to see better what I was trying to do. This is a relatively complicated pieced back -- I had made matching nine-patches, meaning light-dark-light as well as dark-light-dark. Only the latter got used on the front, so I used all the light-dark-light ones on the back. At the same time, I had some toile that was the perfect color scheme for this quilt, but it didn't really go on the front, so I wanted it on the backing. Throw in the pink mattress ticking, and I had a pieced backing. It was all a bit tight (my fault -- I'm still learning!) but I managed and was even able to use the basting method I wrote about here.
This quilt was actually originally planned for a different Amelia (baby daughter of a former colleague) but it came out so pretty (I really love this quilt) that I had to give it to Starman's niece. But he has two other nieces and two nephews, so they all need to get quilts too. Next up, a log cabin quilt for Lucy -- if you design it right (and I'm trying), the blocks make the letter L. And I have an S quilt for Sam coming up after that.
Tuesday, September 16, 2008
Pink Wip, basted
I basted the Pink Wip this afternoon, and am pretty happy with the results. I pieced the back, and made a big mistake in my calculations, so the backing was, in the pieced section, just barely the same size as the quilt top. Well, in theory that's okay, but in reality, when you're basting (by the pin method, or really any method) it's hard to get the top and the back lined up just so, what with the batting obscuring your viewpoint.
But I did use the needle-and-thread method again, and got things pretty darn close, so I'm not too worried about the resulting job binding the quilt. Keep your fingers crossed for me, though -- I'm going to try to get the quilting done in only two days. And we're trying to shift time in our household by getting up 45 minutes earlier every morning so that when we arrive in England on Saturday morning, it won't be quite such a hideous shock to the system. So I might actually be at my sewing machine by some ungodly hour tomorrow morning, like 7:30 a.m. or something.
Well, I might be . . . Okay, so it's not likely, but I might get started before lunch, which will be a change from my current tendency to fritter away valuable quilting time doing stupid stuff.
I'll keep you posted on that one.
Thursday, September 11, 2008
About that Pink WIP
Yes, quilting has actually happened in the time since I last posted here. Let's get some photographic proof of this, shall we?
 When you last saw the Pink WIP, it was just strips to make nine patches. I did go to the trouble of making both light and dark nine patches, and the light ones (meaning, the ones that go light-dark-light on the top and bottom rows of the nine patch) were put aside for the back. Here are the dark ones, interspersed with the mattress ticking and cherry blossom floral print. The renaissance print comes next.
It was at this point that I made an exciting discovery (exciting for me; your mileage might vary): those flower-head pins come in almost a perfect Roy G. Biv rainbow! This was important because I needed to keep these rows straight as I sewed on the setting triangles. I pinned one end of each row with a flower-head pin, then the next row with an adjacent color pin. This helped with keeping the rows in order, but I still managed to confuse myself as to where the corners were! Oh, well, a little reverse sewing never killed anyone. And the pins weren't at fault there -- they did their job, and the rows were sewn together in the correct order!
 Next to the renaissance print, a green marble. It was at this point that I auditioned fabrics for the setting triangles and inner borders. I'm really happy with the result:
 I don't know if this shows up, but it makes it look like there's a field of flowers surrounded by greenery -- a pattern even prettier than I thought it would be. Really, this is a very successful design, for which I have nothing but compliments for Gai Perry. Fabric selection, well, I'll take some small credit for that, but I genuinely can't say enough good things about the design.
Next up: mitered corners.
 Someone wrote to me just as I was getting read to do these corners and when I mentioned that I was doing mitered corners, she said she'd never tried them. "Oh, I don't know of any tricks," I said blithely before it occurred to me that I have an entire bookcase of tricks and tips. I found a good one: you organize the miter, tape it on the right side with masking tape, then sew the miter down while it's still taped. Trust me -- they're still a bear to do, but it came out way better than the last ones I tried.
And here's the completed top:
 The colors are, as always, better in real life. (They're better in the photos above, for that matter!) But you can get the overall effect pretty well here. I absolutely love this quilt top.
I'm working on a pieced back that uses the leftover nine patches and a toile in pink & cream that just didn't make it into this top. I'll photograph that for a later post. Then I need to quilt it, bind it, and give it away. That's going to be the hardest part -- I have absolutely no need for it, but I do love it!
 When you last saw the Pink WIP, it was just strips to make nine patches. I did go to the trouble of making both light and dark nine patches, and the light ones (meaning, the ones that go light-dark-light on the top and bottom rows of the nine patch) were put aside for the back. Here are the dark ones, interspersed with the mattress ticking and cherry blossom floral print. The renaissance print comes next.
It was at this point that I made an exciting discovery (exciting for me; your mileage might vary): those flower-head pins come in almost a perfect Roy G. Biv rainbow! This was important because I needed to keep these rows straight as I sewed on the setting triangles. I pinned one end of each row with a flower-head pin, then the next row with an adjacent color pin. This helped with keeping the rows in order, but I still managed to confuse myself as to where the corners were! Oh, well, a little reverse sewing never killed anyone. And the pins weren't at fault there -- they did their job, and the rows were sewn together in the correct order!
 Next to the renaissance print, a green marble. It was at this point that I auditioned fabrics for the setting triangles and inner borders. I'm really happy with the result:
 I don't know if this shows up, but it makes it look like there's a field of flowers surrounded by greenery -- a pattern even prettier than I thought it would be. Really, this is a very successful design, for which I have nothing but compliments for Gai Perry. Fabric selection, well, I'll take some small credit for that, but I genuinely can't say enough good things about the design.
Next up: mitered corners.
 Someone wrote to me just as I was getting read to do these corners and when I mentioned that I was doing mitered corners, she said she'd never tried them. "Oh, I don't know of any tricks," I said blithely before it occurred to me that I have an entire bookcase of tricks and tips. I found a good one: you organize the miter, tape it on the right side with masking tape, then sew the miter down while it's still taped. Trust me -- they're still a bear to do, but it came out way better than the last ones I tried.
And here's the completed top:
 The colors are, as always, better in real life. (They're better in the photos above, for that matter!) But you can get the overall effect pretty well here. I absolutely love this quilt top.
 I'm working on a pieced back that uses the leftover nine patches and a toile in pink & cream that just didn't make it into this top. I'll photograph that for a later post. Then I need to quilt it, bind it, and give it away. That's going to be the hardest part -- I have absolutely no need for it, but I do love it!
Monday, August 4, 2008
The 15-Minute Rule
I have decided to join in on Judy Laquidara's Star BoM, and she wants to see my fabric. Suits me! Here's a picture (click on it to see more detail):

On the left are the pink-oriented fabrics: the top two are from the On My Porch series that Nancy Smith & Lynda Milligan did for Possibilities for Avlyn, then a print from an unrelated line, and the palest one is from my stash (I just love that fabric). On the right are the greens; the darkest one is also a "Porch" fabric, the middle one is a batik, and the bottom one is another lovely soft mottled print. In the middle are the black & blue fabrics, including the blue & green version of the unrelated pink print, and two more from the "Porch" series. Behind everything is the white tone-on-tone I have for the background.
What's that? That's way more than the 8 fabrics Judy wants? Well, that's true. Basically, I'm substituting the white for her Fabric #1, the three greens for her three shades of lavender to purple, the pinks for her greens, and mixing in the black-backed/blue prints as needed so that each star block pops. It's a tight enough range; I'm not so worried about this becoming confusing. And I have no idea where this quilt will end up -- our house is pretty mellow, but it's still 200 years old, and these colors were not dreamt up in 1800!
But I really don't care -- it's just going to be so pretty!
Oh, and speaking of pretty, I got my copy of Sharyn Squier Craig's LeMoyne Stars book. Awesome -- she's got a helpful, step-by-step tutorial (with pictures!) to explain how to do set-in seams (Y-seaming, she calls it), and lots of templates. There's a lovely sampler quilt to make, and it occurred to me that this would be a great use of my new FQ bundle of all (!!) 44 April Cornell Portugal fabrics. Must think on this some more -- but that's many 15-minute segments away!
It's now such a standard piece of advice that I don't think I can find out who first thought of it, but it's still useful: If there's a job you don't want to do, just do it for 15 minutes. If you do 15 minutes' worth, you'll have made a dent in it, and you might even find that your reluctance has faded and you can do a bit more.
Today was my 15-minutes day. It felt like I got at least 15 minutes' worth of work done on each project. I got some long-overdue thank you notes done (no, not wedding presents -- well, one was a case where I had mailed the thank you note IMMEDIATELY, and it promptly came back from Singapore with a handwritten note: Moved; an email elicited their correct address but I still took too long to remail the originally prompt card), I was a lawyer for about 45 minutes, did about 40 minutes' worth of weeding, and finished ironing a lot of fabric. I didn't actually sew anything; that's going to have to be tomorrow's 15 minute effort.
But here now is my 15-minute blog post. (Which could take longer if Blogger continues to mess me about as I try to upload my meager photo... yup, it took until the next morning! -- Ed.)
Saturday Shopping
I avoid like the plague all the challenges to "bust my stash." Maybe it's the genetic remnants of my parents' Depression child thinking, but I love my stash. I love its size, its pretty colors, and its potential. I love to add to it. I'm unabashed in this regard.
On Saturday, I met up with Candy Tucker, a fellow Pickle who drove down from Syracuse to meet her fellow Candy (aka Wizard) and me. We did a mini-shop hop of the three stores in Endicott, Johnson City, and Vestal, NY, and got great fabric. Candy T. scooped up wonderful brights; I scored some more fabrics for my Coral Pink Wip, some mulberry & related brights for a quilt so abstract right now that I've not even decided what I want to do, just some color families I know I might want to do it in, and some watercolor fabrics. I also got a long length -- on sale, of course -- of a fabric I already own. It's a bright green leafy print on black background and was part of a collection put out by Possibilities for Avlyn called "On My Porch." I had scored two fat quarter bundles of the collection (also on sale) at the same store months ago. In fact, that was the second store we went to, but at the first store, I spotted a black-background floral in another room that made me think of the On My Porch fabrics at home. (When I got up close, it was clear they wouldn't have liked each other if they'd met. The Porch fabrics are all Peter Max colors on a black background, and this floral was more Grammy's pajamas on a black background.)
Well, this got me thinking -- always dangerous -- and so I have decided to participate in Judy Laquidara's Star BOM from blog, Patchwork Times. Using the Porch fabric. Here's the irony. . . I pulled all the other fabrics (and this is NOT a scrappy quilt, so she had some real yardage requirements) from my stash. All of them! I was just about to buy some more of the largest of the Porch fabrics (a real dazzler -- it's brilliant yellow & pink hydrangeas on black) on eBay when I realized that I didn't need to because I could just use existing batiks. Amazing.
I might even end up having inadvertently busted a teensy bit off my stash with this decision. But that's only if I offset fabric recent use vs. Saturday's haul. If you include the fabric I bought in the last few weeks, I'm over the top. And I love it!
Friday, August 1, 2008
Coral Pink Wip
I made a couple quilting New Year's resolutions. First, join a quilt guild. Done. Next, make four quilts in 2008. I could, I suppose, count the Harmony Triangle quilt, but I started it last year, and I really wanted it to be four quilts started and finished in one calendar year.
Now, here's where I could trot out all the reasons why I am making such a late start of it. The wedding, of course, and the fact that I'm now working more as a lawyer. Yadda yadda. I'm sorry, I'm not buying it. I have a sweet deal here, and I have no excuse for not quilting more. So, here's the first quilt done from beginning to end on this blog. Starting at the beginning:
 These are strip sets for nine patched to go into a very color-specific crib-size quilt for a little girl. This is "Lesson 7" from Gai Perry's book, "Color from the Heart." I actually picked it out because I liked the mildly monochromatic approach to the quilt: you take a focus fabric and use that as the outermost border. Everything inside that border builds off that focus fabric.
Right up my alley, I figured, as I have quite a few larger-scale florals that really deserve to not be cut into teensy pieces. I picked one of those -- to be seen in a future post -- and started to assemble the fabrics to go with it. Gai is clearly a stash-and-sew kind of quilter, because I count eight fabrics before you even get to the nine-patches, and those are supposed to be constructed from all new fabrics. You need 20 nine-patch blocks, and she really doesn't want more than three to be in the same fabrics. So, I have six dark/light pairs pictured. Yup, that's right -- I'm probably going to use two of those pairs more than thrice. But seriously -- more than 20 fabrics all in the right color family? That's a lot. (In Gai's defense, there are several examples of how Lesson 7 can come out; I happened to pick one that is more monochromatic than your average quilt.)
The strips are 1.5", so the nine-patch blocks are only 3" finished. Not big. They get put on point, alternated with 3" squares of the other fabrics, then setting triangles, inner (inner) border, outer (inner) border and finally the outer (outer) border, which is the focus fabric you first thought of.
I'd love to get this done before we leave for Alaska, but I also have to complete an applique block, so let's not get too crazy about this. After all, the little girl I'm making it for is still (probably) sleeping in a crib . . .
Now, here's where I could trot out all the reasons why I am making such a late start of it. The wedding, of course, and the fact that I'm now working more as a lawyer. Yadda yadda. I'm sorry, I'm not buying it. I have a sweet deal here, and I have no excuse for not quilting more. So, here's the first quilt done from beginning to end on this blog. Starting at the beginning:
 These are strip sets for nine patched to go into a very color-specific crib-size quilt for a little girl. This is "Lesson 7" from Gai Perry's book, "Color from the Heart." I actually picked it out because I liked the mildly monochromatic approach to the quilt: you take a focus fabric and use that as the outermost border. Everything inside that border builds off that focus fabric.
 Right up my alley, I figured, as I have quite a few larger-scale florals that really deserve to not be cut into teensy pieces. I picked one of those -- to be seen in a future post -- and started to assemble the fabrics to go with it. Gai is clearly a stash-and-sew kind of quilter, because I count eight fabrics before you even get to the nine-patches, and those are supposed to be constructed from all new fabrics. You need 20 nine-patch blocks, and she really doesn't want more than three to be in the same fabrics. So, I have six dark/light pairs pictured. Yup, that's right -- I'm probably going to use two of those pairs more than thrice. But seriously -- more than 20 fabrics all in the right color family? That's a lot. (In Gai's defense, there are several examples of how Lesson 7 can come out; I happened to pick one that is more monochromatic than your average quilt.)
The strips are 1.5", so the nine-patch blocks are only 3" finished. Not big. They get put on point, alternated with 3" squares of the other fabrics, then setting triangles, inner (inner) border, outer (inner) border and finally the outer (outer) border, which is the focus fabric you first thought of.
I'd love to get this done before we leave for Alaska, but I also have to complete an applique block, so let's not get too crazy about this. After all, the little girl I'm making it for is still (probably) sleeping in a crib . . .
The real before and after
I took photos of Harmony (that's just what we call our house) back in February 2006 to email the Starman. That was back when he and I were phone & email buddies. He was prepping his house in Twyford, England to be put on the market, and I guess I thought he'd be interested in what our house(s) looked like. Harmony was a weekend house at that time. And my then-husband (aka Hub 1.0) had a room for his tools and workbench.
Understand, this room has had a few identity-changes in its lifetime. I know that our predecessors used it as a bedroom. They maintained the upstairs bedrooms as guest rooms for the B&B traffic. Even after they stopped running the B&B, they didn't move upstairs. And the people who owned the house before then? Well, there is a proper bathroom in the basement, so I would guess that either of the small rooms downstairs (one's my office; the other is Starman's office) must have been a bedroom at some time.
And then it looked like this in 2006:
 Hey, it could be worse -- I forget what the floor was prior to the flood, but it has a nice (enough) vinyl floor meant to echo the proper cork tile flooring in the TV room. Otherwise, well -- you get the general idea. Three-quarters workspace, one-quarter basement storage. Note the drill press on the left and the pachinko game in the middle.
And now:

Yup, that's the same corner as the shot above. Pretty amazing, hunh?
Tuesday, July 29, 2008
Dictionary Definition
Under "keeper" in the dictionary, there should be a picture of my Starman. He organized an overnight stay at a bed & breakfast in Cooperstown, NY. (Yup, of Baseball Hall of Fame fame.) The B&B he picked is run by a quilter who hails originally from New Zealand. I quilt. I have family in New Zealand. I certainly had fun chatting with Jean about both topics. Score one for Starman's planning efforts.
But wait -- there's more! There's no quilt shop in Cooperstown, but Jean told us about Heartworks Quilts & Fabrics in Fly Creek. (I'm not going to link to their website -- we Googled them this morning and Google warned us not to click on the link as it "might harm your computer." Not sure what that was about, but I'm not taking the chance.) So, even though there were other things we could have done, Starman said, "Sure, let's go to Fly Creek."
What a lovely man! Quilt stores across the nation would appreciate it if all significant others were as supportive. I know many are, but wouldn't it be nice if they all were??? Then they would all be keepers.
Saturday, July 26, 2008
The Quilting Circle of Life
Hey, look at that -- Shelina commented on my yellow quilt! I don't recognize her name, so I suspect she's not a Pickle Road denizen. Maybe she got here from the Quilt Bloggers roll. Don't know. Anyway, I then clicked over to her blog, and she had a link to Carolyn's blog, and Carolyn's got a giveaway going on here. It's all about inspiration, and what inspires us as quilters. I wrote a long comment, so if you want to read it, scroll toward the bottom of the comments -- you know it's me when you see it; I always go on too long!
But this has all gotten me thinking about the connectedness of quilters through the Internet. Back in the olden days, women quilted together. Any job goes faster if you're also having fun, and what's more fun than talking to like-minded friends? These days, that happens less often. Fewer people hand quilt (I don't, and I have to say, I'm unlikely ever to start), and just imagine the dog's breakfast you'd have it you tried to free-motion machine quilt all at the same time with your friends. (One machine or several -- I'm pretty sure it wouldn't come out either way.)
But the Internet allows us to meet new quilters, see what they're doing, and to talk about our lives. I will admit, this blog is meant to be just about my quilting. I have a "regular life" blog elsewhere. But I'm still chatting about life here too. Quilting is life, after all -- and I often think it's been a perfect effort for me: hard to do, I'm not perfect at it, but I'm improving. If that's not a definition of life, I don't know what is.
Thanks, Shelina and Carolyn! You got me thinking.
Wednesday, July 23, 2008
Before . . .
I've finished the Yellow Wip, so it's time to clean the sewing room/office, getting ready for the next project!
Not a moment too soon, either:

In the foreground, my sewing machine cabinet, piled high with fabric, project bags, etc. In the middle ground, a chair and other furniture piled high with fabric, project bags, etc. In the background, a day bed piled high with . . . you get the idea.
 You will have to take my word for it, there's an ironing surface on the left and a cutting surface on the right. They just happen to be piled high with fabric, project bags, . . . oh, never mind.
 My sewing machine, front & center in the room. I use the computer chair when I sew, so that's the one piece of furniture that stays clean.
Not pictured here are the bags upon bags of fabric. I try to be good about buying fabric, but that's a bit of a relative concept. I restrict my purchases to three occasions: 1) when I need something for an ongoing project, 2) when I'm on vacation, and 3) when I've finished something and feel like I deserve a reward. I'm afraid the past month has been a perfect storm of stash building: we vacationed in New England for a week, and I finished the Yellow Wip just in time for a shop hop in my area. I got good stuff, mind you, but that's no excuse... Luckily I also earned some money for the first time in a while (I'm semi-retired as an attorney), so I don't feel guilty.
But I'll sure feel guilty if I don't get this room clean!
. . . During . . .
Halfway through tidying my sewing room, and here's all the fabric that needs sorting and putting away:
 I've organized it by project, and to a certain extent, what its provenance is. I'll show you what I mean.
 The plastic boxes have fabric bought, or culled from the stash, for specific projects. Here's the list so far: The big plastic box on the top of the stack has 30s-era and English multicolored florals, plus 8 yards of white tone-on-tone floral for a scrappy floral quilt on white. Below that are some very soft peachy toned fabrics for a low-contrast log cabin quilt I want to make. There's a jelly roll on the top that might be part of that effort as well.
Below that is a box with yellows and creams, plus the focus fabrics for a tote bag challenge issued by the local quilt guild (which isn't my quilt guild -- Ms. Genius here had to join a guild that's 80 miles away just as gas prices go through the roof!); I want to piece the background and then applique over that. It'll look great if I can pull it off.
The two stacks of fabric are an immediate project to the left (this fabric will be left out -- it's been prewashed and is ready for design stages and then cutting), and a future project to the right. The left stack are muted shades of coral and cream -- a toile, some florals, a stripe -- for a baby quilt I want to do, using a pattern in Color from the Heart by Gai Perry. The right stack are florals for a Blooming Nine-Patch quilt, from Blance Young's book, Traditions with a Twist. On the left, some blue & white fabrics I got in Stowe, and on top a pink floral I got in Williston, VT. I think they'd go well together, don't you? To the right, a focus fabric I got in Williston as well, with some fabrics I got to go with it, and some fabrics I just pulled from my stash. A future project, to be sure, but at least I know what I want to do. Just need to design it, cut it, sew it, quilt it, and bind it. Next week, maybe (cough cough)...
 A bad photo, color-wise, of some really lovely green fabrics I've pulled from my stash. I want to make AmandaJean's star quilt, which she's been doing as a sampler on her blog. I've got a link to the most recent block here. The pins are to help me remember which fabrics I thought could go together where a block needs both a light and a darker color.
 Stash fabric. Some of it is recently purchased, some of it is going back into the stash after coming out for some project or other, and some of it is a recent addition by virtue of the auction at my guild.
 Watercolor swap fabrics on the left, scraps from the guild auction on the right. The watercolor fabbies are going straight to the washing machine for this month's swap; the scraps are going into the closet. Someday I'll do a million-piece, no-two-fabrics-duplicated quilt. But not this
 year decade.
Of course, no sooner had I taken these photos and nearly finished putting everything away, but the mail arrives and . . . you guessed it! More fabric! Including the real indulgence of the month: an entire fat quarter set of April Cornell's Portugal. Yummy! (You can see it in the After photos, if you are very clever.)
. . . and After
 And here it is, all cleaned up. The cutting surface and ironing surface are supplied by Ikea freestanding kitchen furniture. The computer station, bookcases, and shelving for my fabric -- all Ikea. Even the rug is Ikea! The bed, the velveteen chair, and the art work: not Ikea. Oh, and the flowers were a surprise present from my husband, who bought them while doing the grocery shopping. I don't have the heart to tell him that doing the grocery shopping is gift enough!
I have parked the next series of projects in clear plastic boxes. Some are stowed in a cool bag that my cousin, the famous cross stitcher Coffee Jones, gave me. Others are stowed neatly under the chest of drawers.
 Note the clever use of a daybed for extra guests. Although I have to tell you -- I hate being shut out of this room for too long. I need to see my fabric!
 And here it is! I had carefully put nearly all the stacks away when my husband came home and said I had a new delivery from Hancock's of Paducah. I still have a little room left...
 That's my sewing machine, carefully tucked away in a cabinet designed to house a dishwasher. How clever is that? (if I say so myself). This is good because it means that during the cutting stage of a project, I can keep the sewing machine completely put away. I'll be honest, though -- once I start piecing, it doesn't go back in the cubby for a lo-o-ong time.
 Just had to include a photo to show where the sewing machine isn't.
Something Accomplished, Something Done!
 This is the yellow & earth tone quilt I made for my dentist's daughter. The photos aren't doing the colors justice -- I guess yellow is a tough color to capture. I am pleased with the quilting on this one -- for the middle I used a freehand version of a pantograph design I saw in a Fons & Porter issue. (They're very good about showing the quilt design of a quilt they've featured using dotted lines on a washed out illustration.)
 For the middle section, I took advantage of the geometry both of the quilt and the yellow fabric and did a grid freehand.
 And on the outermost border, I did daisies that get cut off by the binding. Aesthetically, I'm not sure that's optimal, but I rather like the effect for other reasons. I used white thread here, and then a variegated yellow thread for the flower centers.
 The back. You can see the middle quilting design a bit better here.
 And here.
I handed the quilt off to the people in the office over my dentist's office -- they're lawyers, which probably doesn't make them more honest than the rest of the world, just more likely to see that there's no point in stealing something when I'm certain to follow up!
Monday, July 14, 2008
Copyright & other legal issues
My life as a lawyer doesn't often overlap with my life as a quilter -- other than the suggestion that I'm equally unskilled at both! But every once in a while, something comes up that gets me thinking both as a quilter and a lawyer.
I belong to the Pickle Road Studio message board on Yahoo, a loose collection of quilters (well, I think one or two of them may be loose...) who are quite vocal on a number of issues. They raised two legal questions regarding copyrights and licenses. I will paraphrase them somewhat:
1) Quilt block designs are as old as the hills and almost all are in the public domain. How does someone collecting the various blocks for a public purpose avoid copyright infringement if the book/website/computer program that contains the block is copyrighted? Just redraw the block?
2) Fabric is designed, and some of it is designed by a name designer who claims rights in the fabric design. Some fabric companies offer "free" patterns on their websites, with a disclaimer and reservation of rights that restricts the quilter from making any money from the resulting quilt. Meaning, you can't make a bunch and sell them on Etsy, at a craft show, etc. Which is fine. But can the fabric designer prevent a quilter from selling just any old quilt (or bag or potholder...) make from the designer's fabric without claiming a licensing fee? So the real question is, when does the designer have rights in the money someone makes from an item made with the designer's fabric? And where's the line between licensing issues, which is a contract claim, and copyright laws?
I had my answers, and then I sought even better answers from a higher authority -- my ex-husband (aka "Hub 1.0"), who is an intellectual property lawyer at a big Philadelphia law firm. His specialty is international patent law, but he is very smart about all IP law, and -- frankly -- about virtually everything else you can think to ask him. Here are his answers:
1). If the block design is "as old as the hills" it must be in the public domain by now. However, if somebody makes a new drawing showing the block design, or a new quilt using the block design, or a new photograph of an old quilt using the block design, there may be a thin copyright in the actual drawing, quilt, or photograph. So, you have to go behind the new drawing, quilt, or photograph, extract the old underlying design, and make your own drawing.
2). Assuming the original designer's authorized textile mill sells (or gives) you the original fabric, so that you are the lawful owner, she has exhausted her rights in the bolt of fabric, and cannot stop you selling the quilt, 17 USC s. 109(a), or publicly displaying it, 17 USC 109(c). That one is difficult to avoid, short of a license that requires you to give the fabric back when you have finished with it. But the exhaustion extends only to the physical fabric that you got from the official source.
However, the *quilt design* (which I interpret as covering choice of block pattern, choice of fabric, which fabric goes in which panels of the block pattern, and possibly some fussy cutting) is a separate work, with a separate copyright.
So, the designer, through her website, provides you with the copyrighted quilt design, with a license to use the design to make a quilt. A license is contractual, so she can impose any terms in the contract that do not fly in the face of public policy or the basic statutory scheme of copyright. For example, a clause saying you can make individual quilts for "social, domestic or pleasure" purposes [That one is an obscure joke on English car insurance, so you will wish to rephrase it.] for free, but must not make them in commercial quantities without paying a license fee, is usually considered proper. Note there is one catch. Unless the license absolutely forbids you from selling or giving the quilt away, or requires you to impose a contractual restraint on the recipient (difficult for a gift), the person you give it to becomes the legal owner, and appears to be protected by the exhaustion clause in s. 109(a) as previously discussed. So your donee can sell it, so a ban on your selling it rather than giving it would be a bit pointless. (The practical limits on enforcing license terms may be more generous to the quilter than the legal limits. A designer whose rigorous enforcement made her as hated and despised as the RIAA would probably face not only bad karma but loss of business.)
If you make pictures of the finished quilt, then I think there is likely to be a problem, because you are likely to be outside both the exhaustion of rights in the fabric and your license to use the design. If you merely want to put up the pictures on your private, non-commercial blog, it may be worth doing a "fair use" analysis, or it may be safer to make the pictures so fuzzy that the exact fabric is not recognizable. We would need to look at the facts a bit more carefully.
Of course, if you do not make an exact copy of the quilt as shown in the downloaded pattern, but make a somewhat similar quilt, it becomes a fact-specific question whether you have taken enough of the designer's creation to have made a "derivative work" that is still controlled by the copyright in the pattern, or whether you have made an original work merely inspired by the pattern, which is not controlled by the earlier copyright.
So there you have it -- basically, make your own representation of classic blocks, and buy the fabric, but if you use the fabric company's free design, read the small print. My thanks to Hub 1.0 for his time thinking about and then answering my questions.
I have a couple general suggestions in the IP realm: credit anyone's photo wherever possible, and if you're not sure if you're allowed to use it, ask permission or don't use it. If you've been "inspired" by a better known quilter's work, and your resulting quilt gets some publicity, be sure to credit the inspiration and mention the better-known quilter by name. It may not be legally necessary, but it's just good manners. Finally, don't make money off anyone else's work. That's a broad injunction, but it's a good rule of thumb, and it would include the case above of selling a quilt you couldn't have made without someone else's work, namely the pattern.
Hope this helps!
Monday, July 7, 2008
Vacation S.E.X.
We're in Maine tonight; tomorrow we'll cross two state lines and end up in Vermont. Now, how many quilt stores can I manage to visit on this trip? Certainly one: I was advised over the weekend not to miss the Calico Basket Quilt shop in Windham, just west of our current location.
Meanwhile, the message board I belong to, Pickle Road Studio on Yahoo!, introduced me to the joys of S.E.X., which stands for Stash Enhancing eXperiences. Suddenly, Starman was off and running with the double entendres. Hey, if it means we can actually stop our trip at a quilt store, and there are no tears when I come out with a shopping bag (and commensurately lighter wallet), he can make all the jokes he wants.
So, in keeping with my theory that vacation S.E.X. is best (not necessarily all the time, but work with me here), we'll see what I can find tomorrow.
The yellow Wip is still wippy, but mostly quilted. I'm pleased with the effect of cross-hatching on the wide (and frankly rather boring) yellow border. I took advantage of the fact that the fabric has a naturally even design that meant I could do all the quilting by eye. No way was I going to mark it.
I'm also pleased that my purchase of a special quilting attachment (the one with the open C-shape at the bottom, and a spring that hops it up and down) has solved (?!) my perennial problem with the main thread breaking as I quilted. That was money well spent!
Alas, no pictures. Let me get home, do the last little bit of quilting on the outer border and then I can show you how well it's come out.
But first, some S.E.X. on the road!
Wednesday, July 2, 2008
Commence Quilting!
I've started quilting the yellow flimsy; my goal is to finish it and sew on the binding before we leave; that way I have the handsewing to do over the weekend and then I can mail it from the road. It will be nice to get it done!
I'm do zone quilting, including a field pattern adapted from a nice, rather Asian looking meander that I found in the current issue of Fons & Porter's Love of Quilting (June/July 2008) on p. 64. I like Fons & Porter for this very reason -- they show a dotted line illustration of the quilting, even when the quilting is obviously done with a long arm machine. I'm machine quilting on a conventional sized machine, but I can adapt the more polished looking design. The way I see it, the more I practice my machine quilting, the better I'll get . . . in a very very long time.
Back to work!
Monday, June 30, 2008
Sharon Schamber's Pinless Basting, Part 4
 And we're done! Hoorah!
I intend to quilt this immediately, but SS makes the point that it could be put away without fear of rusting. I see how that might be useful, but believe me, I'm not going to go to the trouble of making the quilt sandwich and basting it if I'm not going to quilt it asap!
 Close up of the basting. The loose tail is the trailing end of a length of thread. You'll find that the traditional 18" gets used up almost immediately, so I quickly got into the habit of using long lengths of thread at a time. (Let's call it a yard at a time, and not say anything to the stitching police about how far over the length limit I was, okay?)
In order to end a length, just take a second stitch right where the first was, and leave the tail. Knot a new length and you're off & stitching again.
 This is the back. I appear to have gotten the stripes pretty evenly spaced, so I think it will look okay when the binding's in place.
Incidentally, if you do fold it up and put it away, make sure the backing is showing. The backing has the small stitches, where the top has the carrying threads from stitch to stitch. Those carrying threads can catch on stuff, so it's a lot safer and tidier if those long carries are on the inside, out of harm's way.
Incidentally, that back looks good, wouldn't you say? I hope Emily likes it -- her parents specified yellow and earth tones, which I think this stripe exemplifies.
 Here's the backing, close up. See how nice those stitches look? And the one diagonal stitch was done on purpose to show where the center on the top was. I got it pretty much spot on, I'm hoping!
And that's the end of my pictorial essay on Sharon Schamber's pinless basting. Pluses include being able to do it inside, sitting down, and not on a surface larger than your quilt top! Minuses include the insecurity that comes from doing something for the first time ever.
Would I do it again? Certainly for the next quilt I'm doing, which will also be small (crib size, basically) and thus manageable. But the next queen size quilt? I dunno. If I do, I'll tell you all about it when the time comes.
Sharon Schamber's Pinless Basting, Part 3
 Here I've started the herringbone stitch SS calls for. Notice that the stitch is a short (half an inch, say) stitch from right to left. The long slashes are the carries from stitch to stitch.
On her video, Sharon makes the point that this is faster than pin basting. I think she may be right, although it's hard to say because I do pin basting in the loft of our horse barn (nope, no horses, just barn), which is not a place one would linger in, or leave a quilt top out for very long. As a result, on the two occasions when I have basted a quilt there, I have not lingered. You can see why here . . . Anyway, this process pictured here all took place in my nice, cool, mostly insect free dining room. As a result, I happily started the process on Saturday and then finished up Sunday morning. Aggregate times are probably less than pin basting, but it's hard to say.
 Here, the stitching continues. You work from right to left (or left to right if that feels better) over an area roughly 14" from front to back. I suspect I was working on a slightly smaller area, but it doesn't really matter.
I used a basting needle (identified as a millinery needle with basting as the subtitle) and buttonhole thread. SS talks about using pearl cotton without specifying what size. When I next unearth my stash of crochet cotton, I'll see if the smallest of those would work. Here, I wanted something with a fair amount of contrast to the yellows in the quilt top, so I used brown.
 When you've finished the width of the sandwich, it's time to unroll some more backing, smooth down the batting, and unroll the top. Again, this all worked remarkably well. SS advises you to lightly starch the top and backing. I did, simply because I figured it couldn't hurt. I'm not convinced I had to do this, but it's probably a good idea.
 This shows the sandwich in place, ready for the next side-to-side basting. Notice that the quilt top is completely unrolled, but that I've kept the 1x4 in place to add to the stability.
I did make one small mistake while I was at about this point. You will see in this photo, and the one below, that there are a few inches of already-basted sandwich still on the table before the unbasted area begins. Ah, if only I'd had the sense to leave that bit there. Unfortunately, I instinctively moved the already-basted bit down toward my lap, so that the unbasted bit was easier to get to. Well, that resulted in a tiny bit of distortion on one side -- a slight puckering on the quilt top near one edge. I'm not too worried; I figure I'll just snip a few more of the basting threads before I get to quilting that bit, and that will allow me to spread the bubble around.
 What you can't tell in this photo is that the backing is still rolled up on its 1x4 underneath the batting and top. The basting is almost half-way done. Keep stitching in the herringbone style until it's all done!
Final photos in Part 4.
Sunday, June 29, 2008
Sharon Schamber Pinless Basting, Part 2
 I've started to wrap the backing onto its 1x4. This doesn't have to be super snug, but it does have to be relatively straight. Notice that the top still isn't fully wrapped up. You get another opportunity to line the top and the backing, which I was relying on to ensure that the square nature of the pieced back didn't look stupid. Of course, I won't know for sure until I've sewn the binding on, but I did my best to keep it from being too katty-wampus!
 Another view of top and back in mid-roll.
 Here, bot the top and the backing have been fully rolled onto their boards.
At this point in her video, SS rotates the boards on the surface she's working on, so that she doesn't have to move to the other side of the table. In my case, I just walked around and started unwrapping from the left where I had rolled up from the right side of the table.
 It's at this point that you introduce the batting to the process. First, unroll about 16" of the backing, leaving the rest on its 1x4. Next, drape the batting over the backing. Remember, this process is pretty much the same as the standard pin basting with one CRUCIAL difference: because the backing and top are rolled smoothly on heavy pieces of wood, they don't need to be stuck down on the table.
After the batting is smoothed (I actually pat it in place, figured that bubbles can be encouraged to lie flat more easily than they can be stretched out to either side), place the top where you want. Here's where I got somewhat fussing, lining up the center seam with the seam in my backing. In most instances, it would only be necessary to center the top from side to side, and allow a reasonable margin of backing along the edge of the table.
 I've just folded back the quilt sandwich to show that the backing is really the right way around. That's the genius of laying them out properly first -- once they're rolled up, it would be hard to get the backing upside down, but it never hurts to double-check.
In SS's video, she suggests starting with a length of sandwich roughly equal to the length of your arm from wrist to elbow. That's another good thing about her teaching style: she uses common sense concepts like measuring with your body rather than getting hung up on precision at this stage. Trust me, she's got precision nailed elsewhere in her quilting!
Basting, the Sharon Schamber Way
Sharon Schamber, in case anyone doesn't already know, has won Best In Show at Paducah two of the last three years, in both cases by makes very dramatic and intricate quilts with all-around phenomenal workmanship. She has a website, and offers both free tutorial online videos, and pay-for-view videos on more specialized subjects. I don't subscribe -- I'm so far away from what she does that it's like it's on another planet -- but someone on another blog (sorry, don't remember who) mentioned the pinless basting, so I thought I would give it a try. You can watch the video here.
First, some back story. The quilt top is approximately 50" square. I pieced the back out of an asymmetrical stripe. I just had to try to make it form boxes, so I cut the four pieces on the diagonal and pieced it really carefully to reduce the distortion for the bias edges. Seems to have worked, although I didn't have nearly enough fabric to make it line up all the colors perfect. Hey, it's the back of the quilt, and the kid's going to spit up on it, so let's not get all matchy-matchy about this, okay?
 The first step is to lay out the backing, wrong side up, just as you would do if you were doing the more usual pin basting. I worked on my dining room table (part of the appeal of this method was that it didn't involved going out to the barn and spraying all the wasps' nests before I got started). The blue tape is NOT holding the backing to the table -- they are registration marks showing me where the quilt top should go so that the middle of the back will actually be in the middle of the quilt top.
 Next, quilt top goes down on top of the backing, right side up. Note that there is no batting yet. I also didn't work too hard on getting the top and back to line up at this point.
 Another view of the top. There will be variations in the color of the photos I took. Some seemed to work better with the flash, and some with the north light coming from the window to the left.
The next stage is to put a piece of straight lumber down on the top and start to roll it up. I picked out two relatively cheap pieces of oak 1x4 trim at Lowe's. I think what Sharon suggests is pre-primed trim pieces that would be smaller. If I use this method for larger quilts, I'll have to get longer lumber, and then I might see if I can get the stuff she used. But the two pieces I used are quite heavy, which turns out to be useful.
 I've wrapped the top onto its 1x4, leaving the backing still on the table. Next, I'll wrap the backing on its own 1x4. You'll see in the next picture that I don't need to do all the wrapping at once. Sharon makes the point in her video that the weight of the lumber holds everything very smooth and secure, which makes this method possible.

This shows the top rolled onto its 1x4, while the back is still on the table. I can't explain the ripples on the backing; they don't seem to have affected the process, so either I smoothed them out before I wrapped the backing onto its board, or something.
That ghostly draping in the background is the batting. I actually bought two bats at JoAnn's the other day -- one that was just barely too small, and a larger one for the next quilt I plan on doing. Good thing, or I wouldn't have been able to get started with this project . . . again!
First, some back story. The quilt top is approximately 50" square. I pieced the back out of an asymmetrical stripe. I just had to try to make it form boxes, so I cut the four pieces on the diagonal and pieced it really carefully to reduce the distortion for the bias edges. Seems to have worked, although I didn't have nearly enough fabric to make it line up all the colors perfect. Hey, it's the back of the quilt, and the kid's going to spit up on it, so let's not get all matchy-matchy about this, okay?
 The first step is to lay out the backing, wrong side up, just as you would do if you were doing the more usual pin basting. I worked on my dining room table (part of the appeal of this method was that it didn't involved going out to the barn and spraying all the wasps' nests before I got started). The blue tape is NOT holding the backing to the table -- they are registration marks showing me where the quilt top should go so that the middle of the back will actually be in the middle of the quilt top.
 Next, quilt top goes down on top of the backing, right side up. Note that there is no batting yet. I also didn't work too hard on getting the top and back to line up at this point.
 Another view of the top. There will be variations in the color of the photos I took. Some seemed to work better with the flash, and some with the north light coming from the window to the left.
The next stage is to put a piece of straight lumber down on the top and start to roll it up. I picked out two relatively cheap pieces of oak 1x4 trim at Lowe's. I think what Sharon suggests is pre-primed trim pieces that would be smaller. If I use this method for larger quilts, I'll have to get longer lumber, and then I might see if I can get the stuff she used. But the two pieces I used are quite heavy, which turns out to be useful.
 I've wrapped the top onto its 1x4, leaving the backing still on the table. Next, I'll wrap the backing on its own 1x4. You'll see in the next picture that I don't need to do all the wrapping at once. Sharon makes the point in her video that the weight of the lumber holds everything very smooth and secure, which makes this method possible.
This shows the top rolled onto its 1x4, while the back is still on the table. I can't explain the ripples on the backing; they don't seem to have affected the process, so either I smoothed them out before I wrapped the backing onto its board, or something.
That ghostly draping in the background is the batting. I actually bought two bats at JoAnn's the other day -- one that was just barely too small, and a larger one for the next quilt I plan on doing. Good thing, or I wouldn't have been able to get started with this project . . . again!
Subscribe to:
Posts (Atom)

