Sunday, August 16, 2009

I Finished Something!

Believe it or not, I have actually finished something. A quilt. Done. Mailed off, even. And received! (This is nearly a miracle. I think I worked on this quilt for close to nine months -- a labor of love in all senses of the term!)

A log cabin quilt, done in the colors I recalled from the decor of Lucy's room -- Lucy is Starman's niece, and our senior bridesmaid last spring in Yorkshire.

As I recalled her room, it had a pale pink wall, a pale (very pale) green wall, and some deep cerise fluffy pompoms strung on clear line near the ceiling.

This quilt ended up being rather more dominated by turquoise than I'd intended but that turns out to be an easier color to design around than dark green.

The border fabric.

The edging is a batik (or batik-style) fabric I also used in the back.

Which I pieced.

Yes, I am certifiably crazy. The nice men with the nets are coming for me even as I type this. I *thought* it would go quickly, as I was using a technique from the book Totally Tubular by Rita Hutchens; I'd seen it on TV and thought it looked easy. Which is kinda sorta is. I also thought it would be quick, which it kinda sorta is if you only do a wall hanging, such as is feature in her book. I was right on one point, though -- I did realize that because it ended up more-or-less on the bias, it could be made big enough for the backing without any concerns about keeping it square on to the front. I had that problem with this quilt, and I didn't want to repeat it.

Here's the backing:


Unfortunately, I didn't get the dimensions right as I had planned it, so I had to add in solid brick-shapes of the floral fabric and chop up the pinwheels more than I would have liked. I mean, seriously -- it's the BACKING. It didn't deserve the months & months of labor I put into it.

(At the same time -- and this will be my defense when the guys with nets come by -- Starman's niece is at an age where the quilt is fine for now, but it would be nice if she could use it at university and beyond. Flexibility was a consideration. So it's reversible. That doesn't entirely justify the amount of work I put in, but it's part of my thinking.)

Here's your proof that the binding was used in the backing. I know you care about that.

These colors didn't quite come out in these pictures -- again, it's all trending toward the turquoise -- but what I wanted to suggest was a flower garden with a seafoam green connection.

Okay, the guys in the nets can come along now; I'm ready for the padded cell. Except that Starman's nephew, Sam, has asked for a quilt and I've agreed. One thing's for sure -- it's getting a plain back!

Friday, January 23, 2009

Quilting & Cricket

I have been sewing recently, but the Totally Tubular quilting approach referenced in my last post takes forever. It's a bit like cricket, really -- the game, not the insect.

In cricket (as I understand it) there are two teams. One team bats first and plays all its innings right then -- well, over a lo-o-ong time; test matches take three days! -- and scores all its runs before the game switches over to the other team's batting. The second team knows what score they have to beat (usually a 3-figure number) and they start racking up the runs before all their men get out. If they score more runs, they win; if they don't, the first team wins.

Now, imagine this in baseball terms: The Red Sox sends up batter after batter until they've used up all 27 outs. If they've scored ten runs, great. If they've scored only three runs, that's a bit less impressive. Then the Yankees come to bat, and they get 27 outs. If they need to score 11 runs to beat the Red Sox, that's one thing; if it's only four runs, that's another.

D'you see yet how this could be rather boring? Basically one team is ahead until they're not, at which point the game is over. I'm assured by Hub 1.0 that cricket is more interesting than that, but really I think he's confused. Sure any game in which there's a googly, a square leg, a first slip, a maiden, a silly mid-on, a chinaman, a golden duck, and a daisycutter is not all bad, but the quirky vocabulary can't make up for the fundamental flaws in how the game is structured.

Well, the piecing for the tubular back I'm doing is a bit cricket-ish: sew strips together until they're all sewn together. Iron those, then cut them again, then sew some more, then iron, cut, sew, etc., over and over until finally: a huge piece of patchwork miraculously appears. Like cricket, you're not ahead until you're done.

This is discouraging -- while I've no doubt that my work is actually accruing, there's none of the satisfaction from completing a block, and then another and another. The front of this quilt has log cabin blocks in two color ways. I did strip piecing, but at least I got half the blocks done before I started the next set. Then I cut the sashing and cornerstones and sewed the rows, then cut and sewed the borders. At each stage, there was a real sense of accomplishment.

Now, I'm the first to admit that it's the height of quixotic folly to decide to piece the back of this quilt. The reason why I'm doing it is, the quilt is intended to "go" with my niece Lucy's room in Yorkshire. As I recall the room, it's got white, palest pink, and palest mint green walls with some leaves stenciled on one wall in darker green, and hot pink puff balls along the ceiling. I had a hard time finding just the right shades of pink and green, so the log cabin blocks are all bolder and brighter than I would have preferred. The white sashing looks quite bold as well. I like the overall effect, it's just not quite what the room called for.

In my search for the right fabrics, I found one that had some softer colors in a large, rather modern print. This fabric wasn't perfect either, but it was so appealing, I got some. The tubular pattern I'm using alternates large blocks of a solid fabric (the book uses black) and that's where the large-scale print comes in. The piecing is in a fairly simple looking block that would be a pain to do using traditional methods; I have eight different color combinations for that part.

In the end -- if I've planned this adequately! -- the pieced back will be virtually a reversible quilt top. That way if Lucy repaints her room, or moves to university, or whatever, she'll have options for the quilt.

Pictures soon, I promise. But at the moment, it's still a boring old cricket game.

Wednesday, December 31, 2008

More fabric?

I have not been keeping up with this blog, clearly, just as I haven't been keeping up with my quilting. I'm working this week on the pieced back to a quilt for Starman's niece, Lucy. I've finished the top, but I got it in my head to make a top using a technique I saw on TV called "tubular quilting." There's a book by Rita Hutchens that shows how you sew strips together into a tube, then cut the tube into strips, sew those strips together into a tube, cut that tube up, and sew those bits together. It's ingenious, but still ambitious for the back of a quilt. The good news is that it will make a large piece of fabric for the back that won't have to be perfectly straight vis a vis the top.

I owe you pictures, and you will get them, I promise.

I did have fun today shopping. Just as I live a zillion miles away from my quilt guilt, I live a long way away from the nearest quilt shops. I wanted the sort of threat that's good for piecing -- it's thinner (finer would be a better way to describe it, I guess) so the seams aren't bulky and that makes for a better, more consistent quarter-inch seam. Anyhoo, I have some in a medium grey, but I know I'll run out soon. I thought, Oh, goody, an excuse to shop! Come to find out, neither shop I visited has the sort of thread I was talking about. (One shop had finer thread, but it was polyester. It make be a superstition, but I do adhere to the principle that the thread should be the same fibre as the cloth, namely cotton.) But they both had sale fabrics -- more of the key fabric I'm using for the backing, and some great backing fabrics at one shop, and lots of pretty pinks, florals & green leafy fabrics at the other.

I came home very happy with my purchases, even if I didn't actually get the one thing I wanted! And that's pretty much the story of fabric shopping for me...

Saturday, November 8, 2008

Amelia's Garden Quilt

I did actually finish this one, just in time (like -- no lie -- the night before we arrived in Ruislip, where Amelia lives) for our visit to Starman's sister and brother-in-law.

Here's Amelia on her brand new quilt. She's wearing her bridesmaid dress -- it turned out to be a surprisingly warm and sunny September day.

Her blue and white dress was, of course, not Amelia's choice of color scheme -- she's a very pretty-in-pink sort of girl. The quilt fits in much better with her aesthetic.

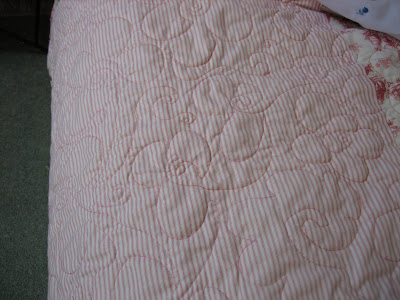
Free motion quilting on the back -- again, I borrowed a loopy floral design I saw in a magazine. I'm not yet considering myself an accomplished free motion quilter, but I'm getting better. Most importantly, I now feel confident that I can do the quilting on these utilitarian quilts. I'm not yet at the "heirloom" quilt level, and forget show quilts. But hey, most of what I want to do is make utilitarian quilts, so that's fine for now.

This isn't a very helpful photo, but if you click on it you'll be able to see better what I was trying to do. This is a relatively complicated pieced back -- I had made matching nine-patches, meaning light-dark-light as well as dark-light-dark. Only the latter got used on the front, so I used all the light-dark-light ones on the back. At the same time, I had some toile that was the perfect color scheme for this quilt, but it didn't really go on the front, so I wanted it on the backing. Throw in the pink mattress ticking, and I had a pieced backing. It was all a bit tight (my fault -- I'm still learning!) but I managed and was even able to use the basting method I wrote about here.

This quilt was actually originally planned for a different Amelia (baby daughter of a former colleague) but it came out so pretty (I really love this quilt) that I had to give it to Starman's niece. But he has two other nieces and two nephews, so they all need to get quilts too. Next up, a log cabin quilt for Lucy -- if you design it right (and I'm trying), the blocks make the letter L. And I have an S quilt for Sam coming up after that.

Tuesday, September 16, 2008

Pink Wip, basted

I basted the Pink Wip this afternoon, and am pretty happy with the results. I pieced the back, and made a big mistake in my calculations, so the backing was, in the pieced section, just barely the same size as the quilt top. Well, in theory that's okay, but in reality, when you're basting (by the pin method, or really any method) it's hard to get the top and the back lined up just so, what with the batting obscuring your viewpoint.

But I did use the needle-and-thread method again, and got things pretty darn close, so I'm not too worried about the resulting job binding the quilt. Keep your fingers crossed for me, though -- I'm going to try to get the quilting done in only two days. And we're trying to shift time in our household by getting up 45 minutes earlier every morning so that when we arrive in England on Saturday morning, it won't be quite such a hideous shock to the system. So I might actually be at my sewing machine by some ungodly hour tomorrow morning, like 7:30 a.m. or something.

Well, I might be . . . Okay, so it's not likely, but I might get started before lunch, which will be a change from my current tendency to fritter away valuable quilting time doing stupid stuff.

I'll keep you posted on that one.

Thursday, September 11, 2008

About that Pink WIP

Yes, quilting has actually happened in the time since I last posted here. Let's get some photographic proof of this, shall we?

When you last saw the Pink WIP, it was just strips to make nine patches. I did go to the trouble of making both light and dark nine patches, and the light ones (meaning, the ones that go light-dark-light on the top and bottom rows of the nine patch) were put aside for the back. Here are the dark ones, interspersed with the mattress ticking and cherry blossom floral print. The renaissance print comes next.

It was at this point that I made an exciting discovery (exciting for me; your mileage might vary): those flower-head pins come in almost a perfect Roy G. Biv rainbow! This was important because I needed to keep these rows straight as I sewed on the setting triangles. I pinned one end of each row with a flower-head pin, then the next row with an adjacent color pin. This helped with keeping the rows in order, but I still managed to confuse myself as to where the corners were! Oh, well, a little reverse sewing never killed anyone. And the pins weren't at fault there -- they did their job, and the rows were sewn together in the correct order!

Next to the renaissance print, a green marble. It was at this point that I auditioned fabrics for the setting triangles and inner borders. I'm really happy with the result:

I don't know if this shows up, but it makes it look like there's a field of flowers surrounded by greenery -- a pattern even prettier than I thought it would be. Really, this is a very successful design, for which I have nothing but compliments for Gai Perry. Fabric selection, well, I'll take some small credit for that, but I genuinely can't say enough good things about the design.

Next up: mitered corners.

Someone wrote to me just as I was getting read to do these corners and when I mentioned that I was doing mitered corners, she said she'd never tried them. "Oh, I don't know of any tricks," I said blithely before it occurred to me that I have an entire bookcase of tricks and tips. I found a good one: you organize the miter, tape it on the right side with masking tape, then sew the miter down while it's still taped. Trust me -- they're still a bear to do, but it came out way better than the last ones I tried.

And here's the completed top:

The colors are, as always, better in real life. (They're better in the photos above, for that matter!) But you can get the overall effect pretty well here. I absolutely love this quilt top.

I'm working on a pieced back that uses the leftover nine patches and a toile in pink & cream that just didn't make it into this top. I'll photograph that for a later post. Then I need to quilt it, bind it, and give it away. That's going to be the hardest part -- I have absolutely no need for it, but I do love it!


Monday, August 4, 2008

The 15-Minute Rule

I have decided to join in on Judy Laquidara's Star BoM, and she wants to see my fabric. Suits me! Here's a picture (click on it to see more detail):


On the left are the pink-oriented fabrics: the top two are from the On My Porch series that Nancy Smith & Lynda Milligan did for Possibilities for Avlyn, then a print from an unrelated line, and the palest one is from my stash (I just love that fabric). On the right are the greens; the darkest one is also a "Porch" fabric, the middle one is a batik, and the bottom one is another lovely soft mottled print. In the middle are the black & blue fabrics, including the blue & green version of the unrelated pink print, and two more from the "Porch" series. Behind everything is the white tone-on-tone I have for the background.

What's that? That's way more than the 8 fabrics Judy wants? Well, that's true. Basically, I'm substituting the white for her Fabric #1, the three greens for her three shades of lavender to purple, the pinks for her greens, and mixing in the black-backed/blue prints as needed so that each star block pops. It's a tight enough range; I'm not so worried about this becoming confusing. And I have no idea where this quilt will end up -- our house is pretty mellow, but it's still 200 years old, and these colors were not dreamt up in 1800!

But I really don't care -- it's just going to be so pretty!

Oh, and speaking of pretty, I got my copy of Sharyn Squier Craig's LeMoyne Stars book. Awesome -- she's got a helpful, step-by-step tutorial (with pictures!) to explain how to do set-in seams (Y-seaming, she calls it), and lots of templates. There's a lovely sampler quilt to make, and it occurred to me that this would be a great use of my new FQ bundle of all (!!) 44 April Cornell Portugal fabrics. Must think on this some more -- but that's many 15-minute segments away!

It's now such a standard piece of advice that I don't think I can find out who first thought of it, but it's still useful: If there's a job you don't want to do, just do it for 15 minutes. If you do 15 minutes' worth, you'll have made a dent in it, and you might even find that your reluctance has faded and you can do a bit more.

Today was my 15-minutes day. It felt like I got at least 15 minutes' worth of work done on each project. I got some long-overdue thank you notes done (no, not wedding presents -- well, one was a case where I had mailed the thank you note IMMEDIATELY, and it promptly came back from Singapore with a handwritten note: Moved; an email elicited their correct address but I still took too long to remail the originally prompt card), I was a lawyer for about 45 minutes, did about 40 minutes' worth of weeding, and finished ironing a lot of fabric. I didn't actually sew anything; that's going to have to be tomorrow's 15 minute effort.

But here now is my 15-minute blog post. (Which could take longer if Blogger continues to mess me about as I try to upload my meager photo... yup, it took until the next morning! -- Ed.)